Editing your Webflow site

Accessing the Editor from your live site
You can access the Editor for your website by adding /?edit to the end of your website URL in the browser address bar (e.g., yourwebsite.com/?edit). Once you log in, you can access your website in Editor mode.
When you return to the site later, they may see the “Edit site” button in the lower right corner, which you can click to hop into Editor mode.
Note: you will need to set your browser to accept cookies from all third parties to use the Editor — otherwise, you may see an error message when trying to log in to the Editor.
The Editor toolbar
When you access the Editor, you’ll see your live website with the Editor toolbar (the gray bar) collapsed at the bottom of your screen. Through this toolbar, you can access the various Editor panels to manage page settings, dynamic content, forms, and your Editor account. You can also see and publish the changes you make through the Editor.
The Editor toolbar features the following tabs and icons:
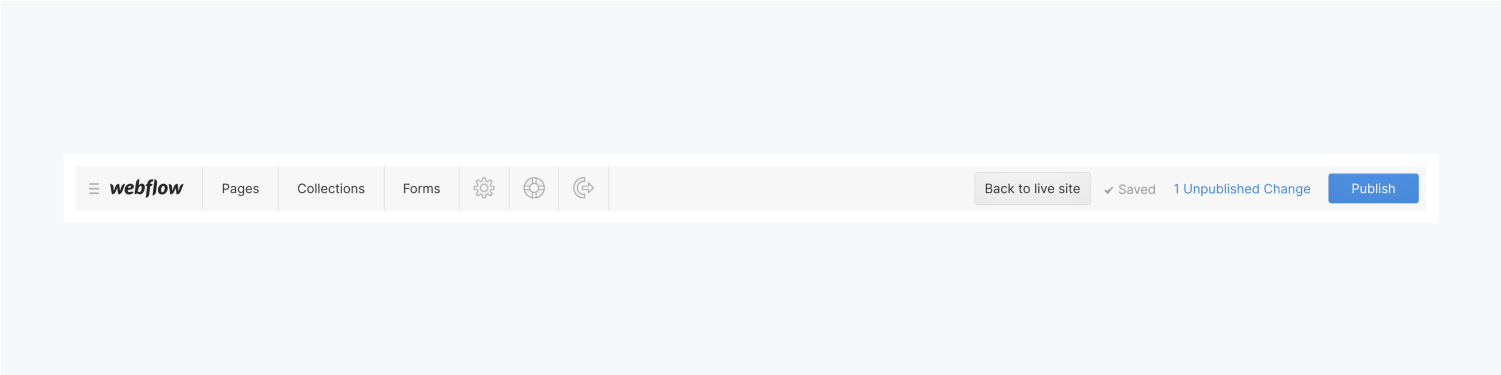
Menu - Use this menu to go to the Dashboard, your Project Settings, or the Designer.
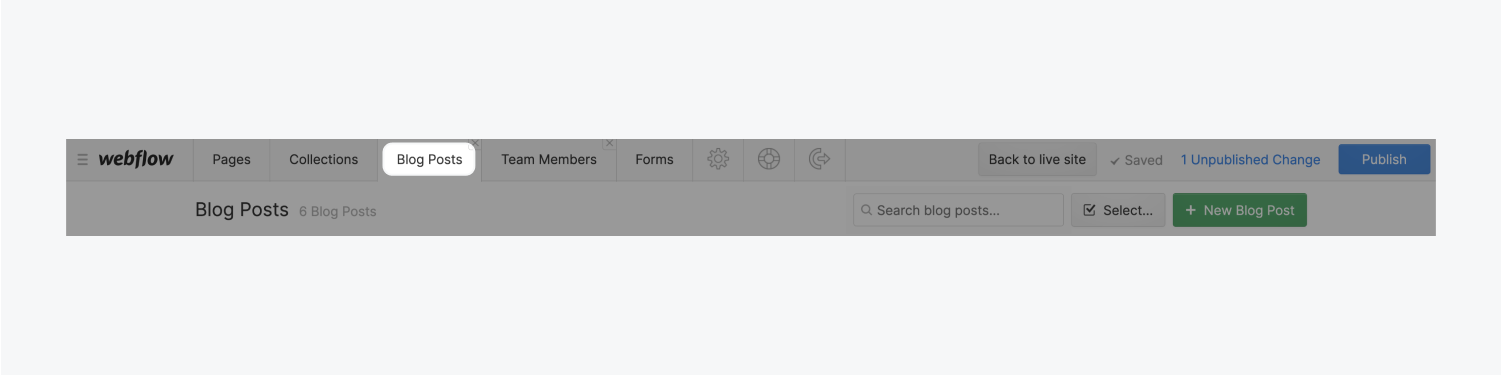
Pages - opens the Pages Panel, which lists your site’s static pages and dynamic Collection pages. From here, you can browse for a page, click to view the live page and manage the settings of any page.
Collections - opens the Collections Panel, which lists all your Collections. Clicking on a Collection opens a new tab in the toolbar, which opens the Collection items’ panel listing of all the items in that Collection. Here, you can edit any item or create new ones.
Forms - opens the Forms Panel where you can see and download form submissions made on the site.
Account Settings (icon) - opens the Account Settings Panel where you can edit your Collaborator account info and upload a profile image.
Help & Support (icon) - opens the Help and Support Panel, where you can find answers to a few common questions about using the Editor.
Log out (icon) - logs you out of the Editor after confirmation.
Back to live site (button) — Switches from Editor mode to Live-site mode, which allows you to view your site as your site visitors will see it.
Saving/Saved - all changes are saved automatically in the Editor. The Saving... and Saved status at the bottom left show this.
Changelog - this shows the number of unpublished changes next to the publish button at the bottom left. Clicking the changelog reveals a list of items and pages with unpublished changes, and you can see which Collaborator made them.
Publish (button) - allows you to publish all the changes you make when in the Editor.
On-page editing
Editing right on the page is pretty intuitive with the Editor. As you hover over various elements, an edit icon will appear to the upper right of editable elements. To edit any of these elements, simply click the icon.
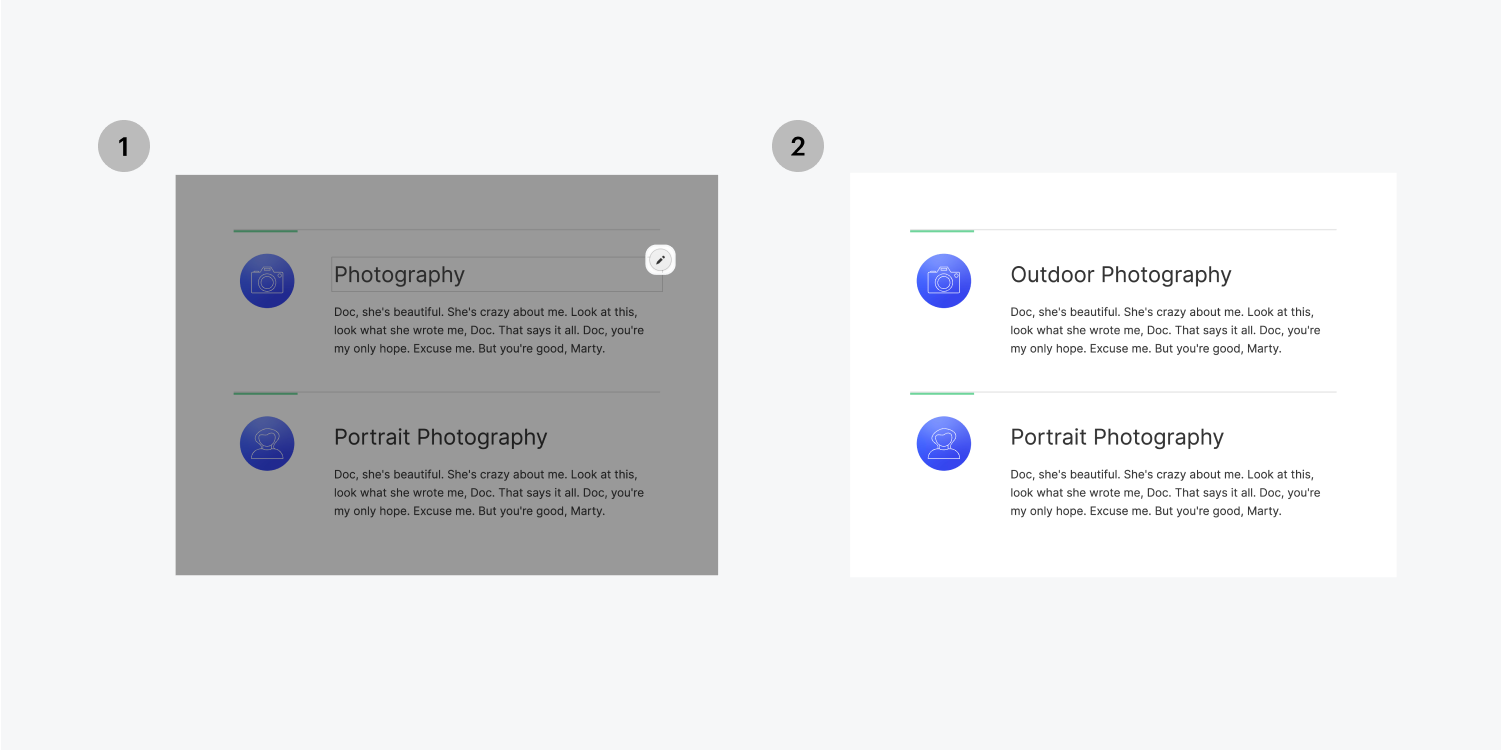
Some styling and custom code will not show as they should appear on the published site. That is normal behavior when you’re in the Editor.
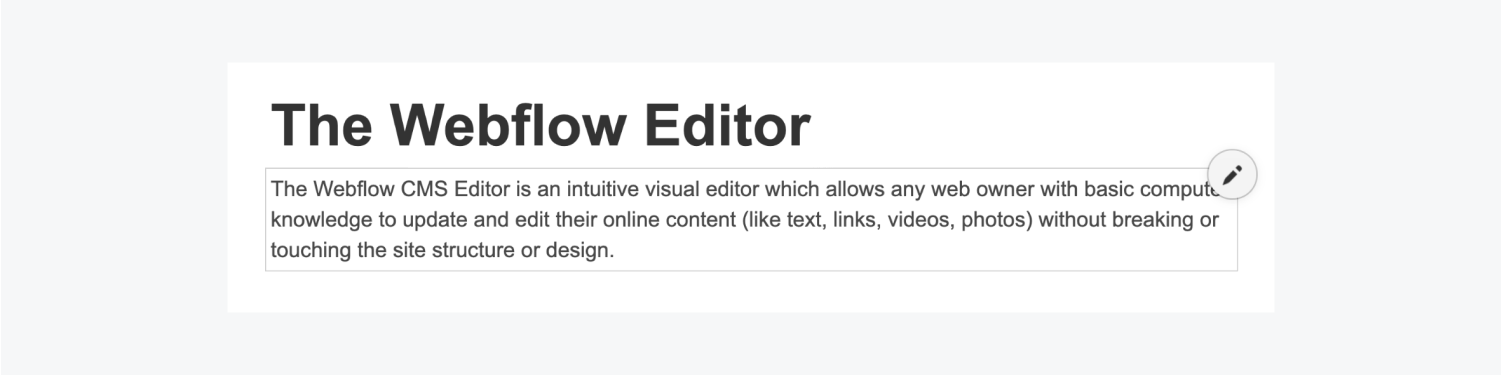
Editing and formatting text
When hovering over editable text elements, you’ll see a light-gray outline around the text element and a pencil icon in the upper right. You can edit the text by clicking into the box.
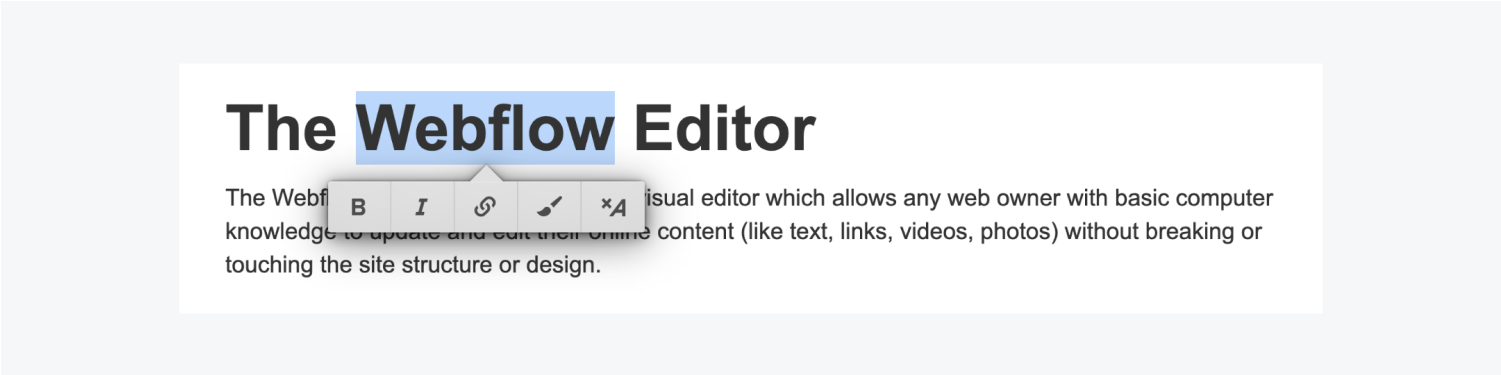
You can also format words or phrases by selecting them and choosing the formatting from the floating toolbar that appears. Read more about inline text formatting.
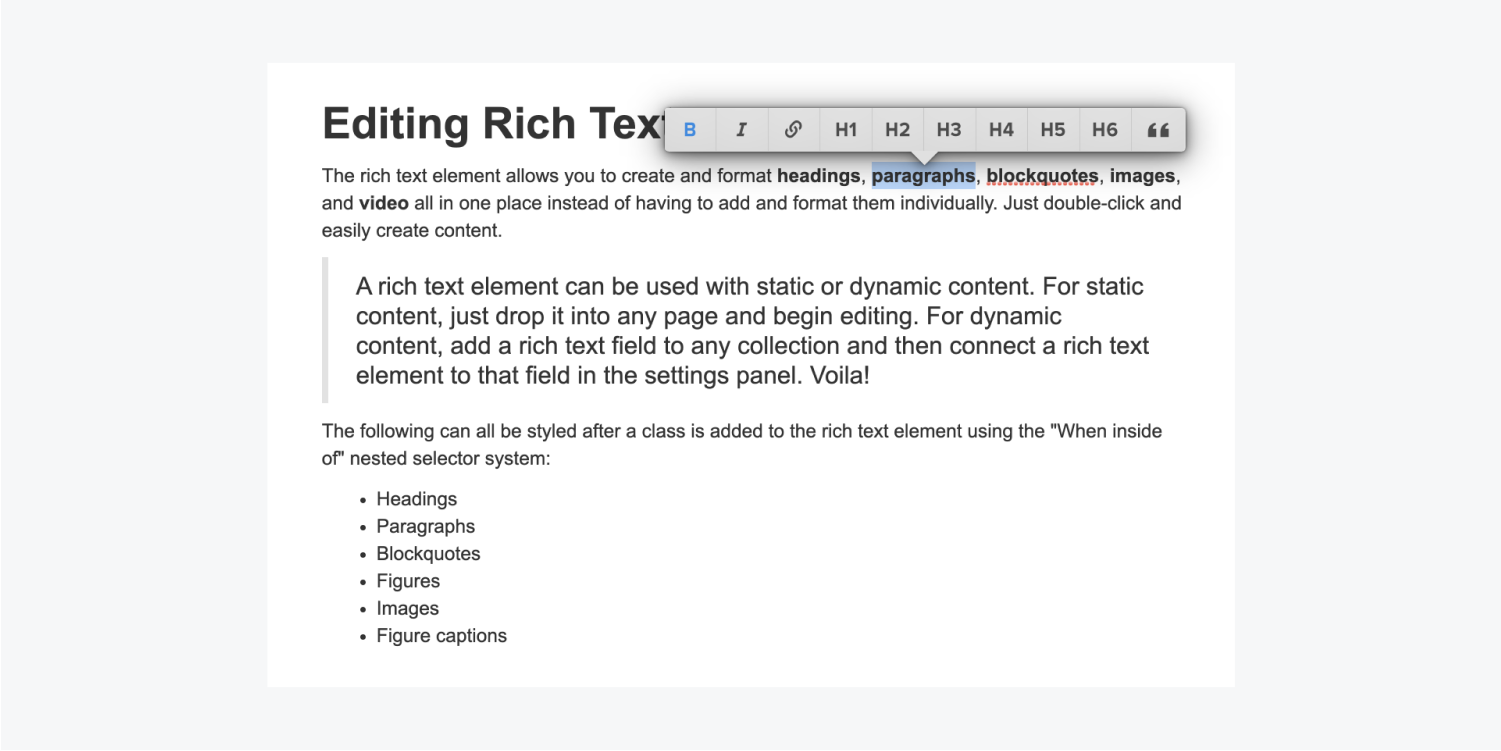
For Rich text elements, you can do more: add media, create lists, style, and format your text further. Learn more about rich text elements.
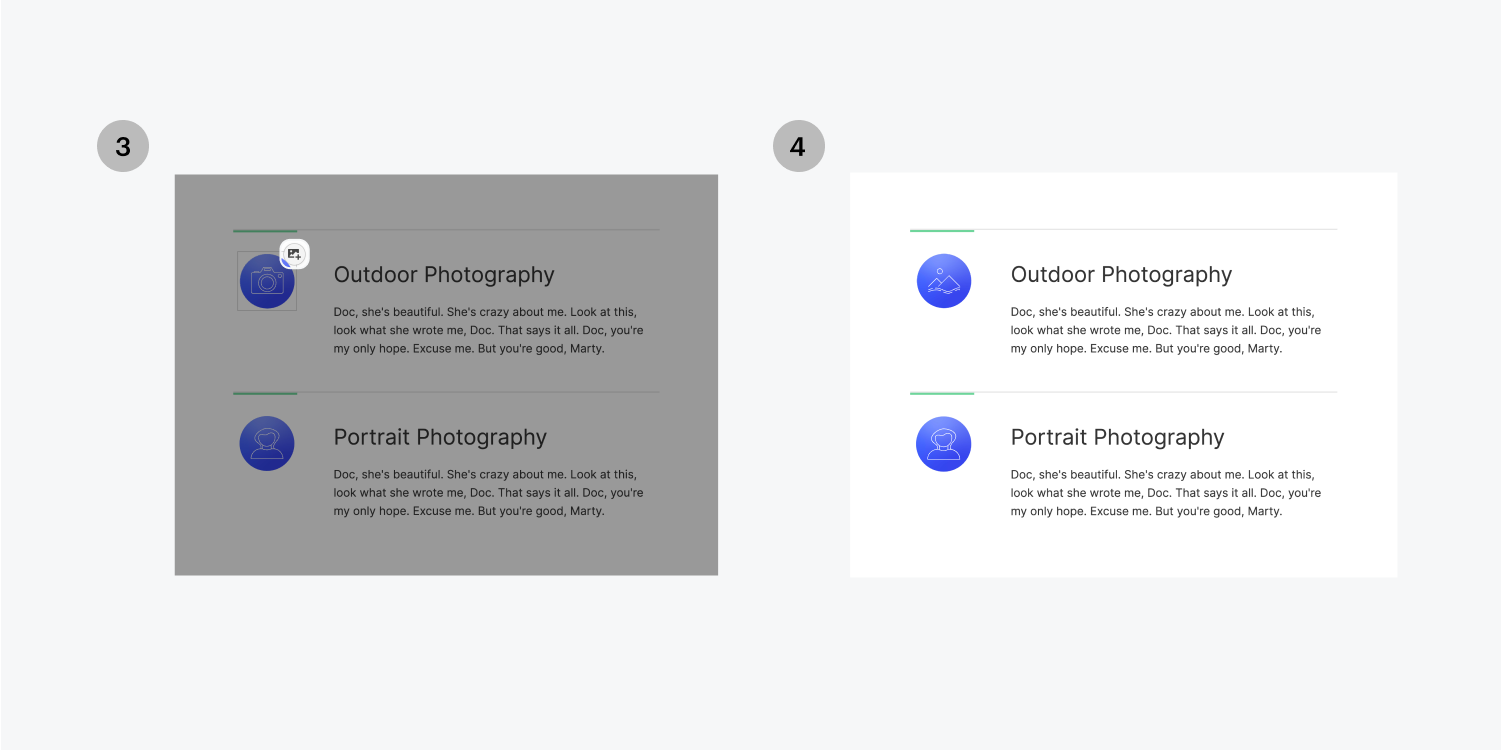
Replacing images
You can also replace images right on the site. Just hover your cursor over the image you want to replace, then click the picture icon. This will allow you to select and upload a new image from your computer.
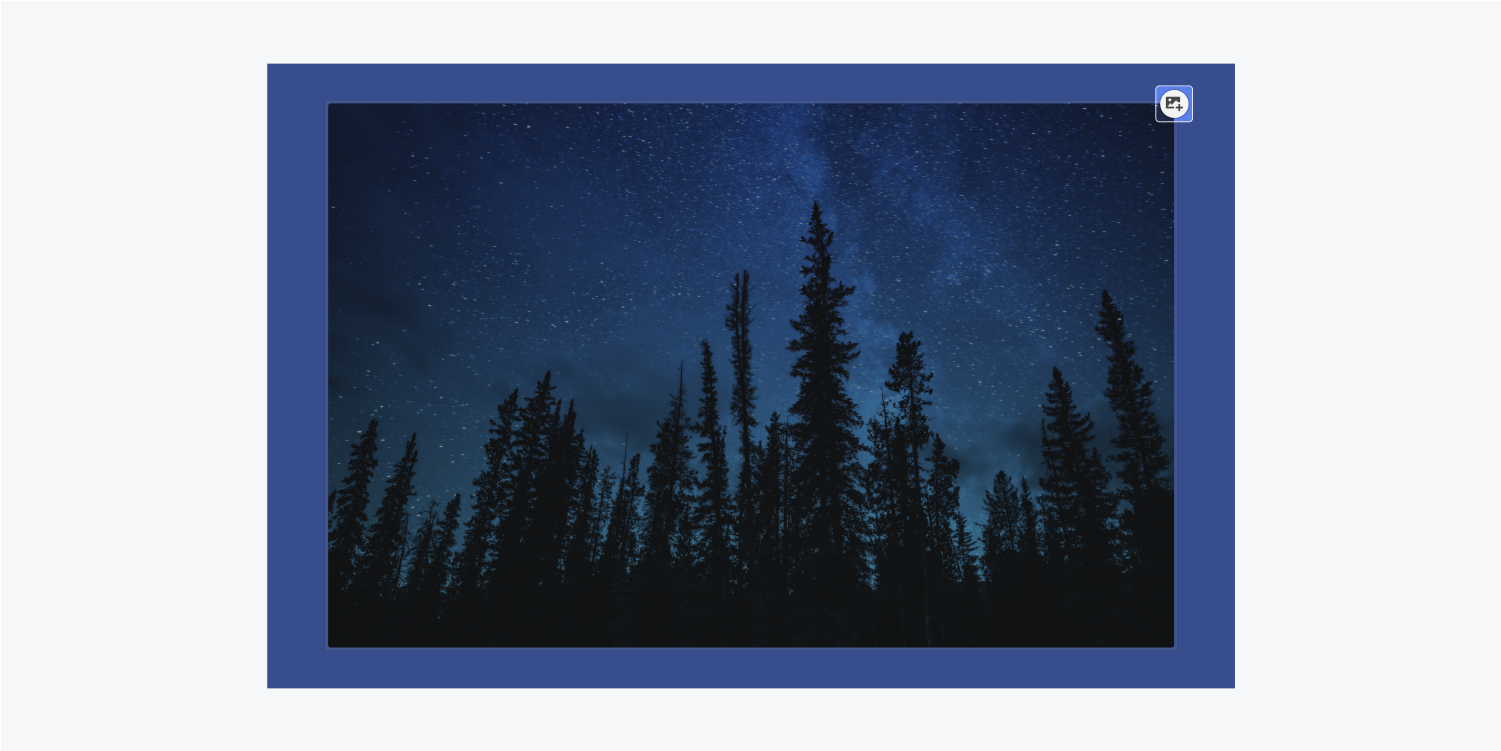
Any visual styles you’ve created for an element in the Designer, such as solid color overlay, border color, or shadow, will automatically apply to any image or background image you replace through the Editor.
Editing buttons
To edit a button element, hover your cursor over the button and click on the Settings icon that appears in the upper right.
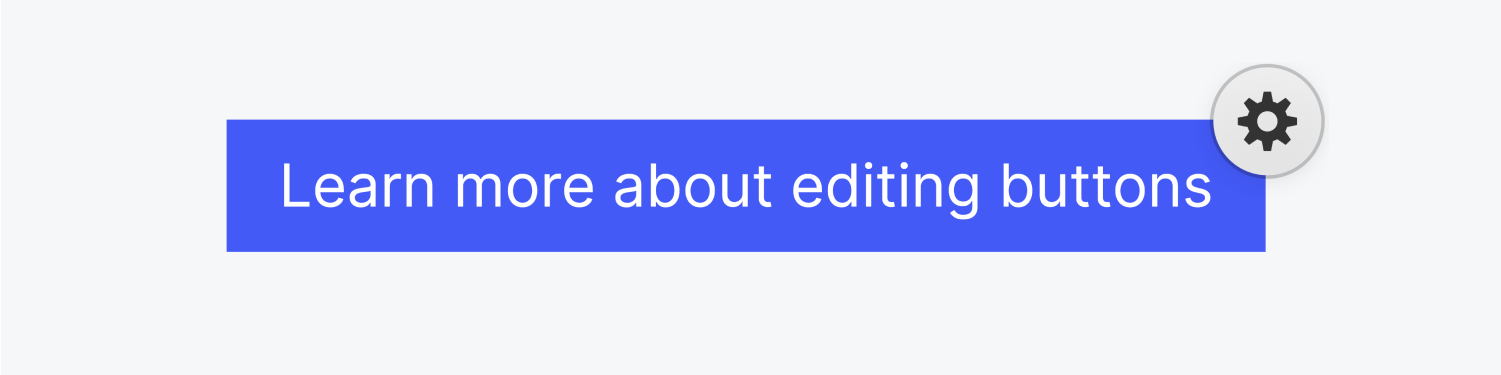
You’ll see two options:
- Edit link settings - lets you update the link of the button
- Edit text - enables you to change the button text

Managing page settings
From within the Pages Panel in the Editor, you can manage vital page settings like SEO meta title and description, Open Graph title and description, and Open Graph image. You can also manage page password protection settings for static pages and RSS feed settings for Collection pages.
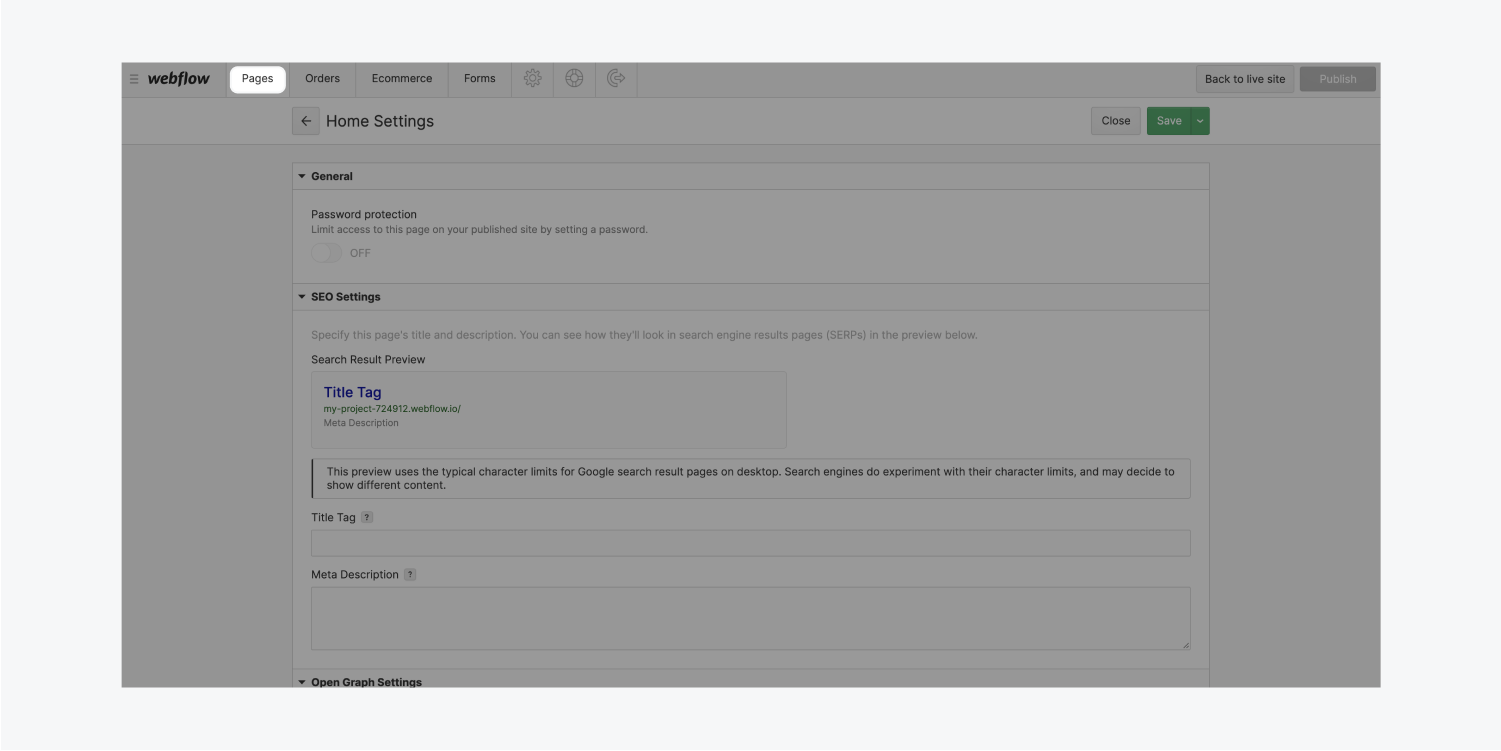
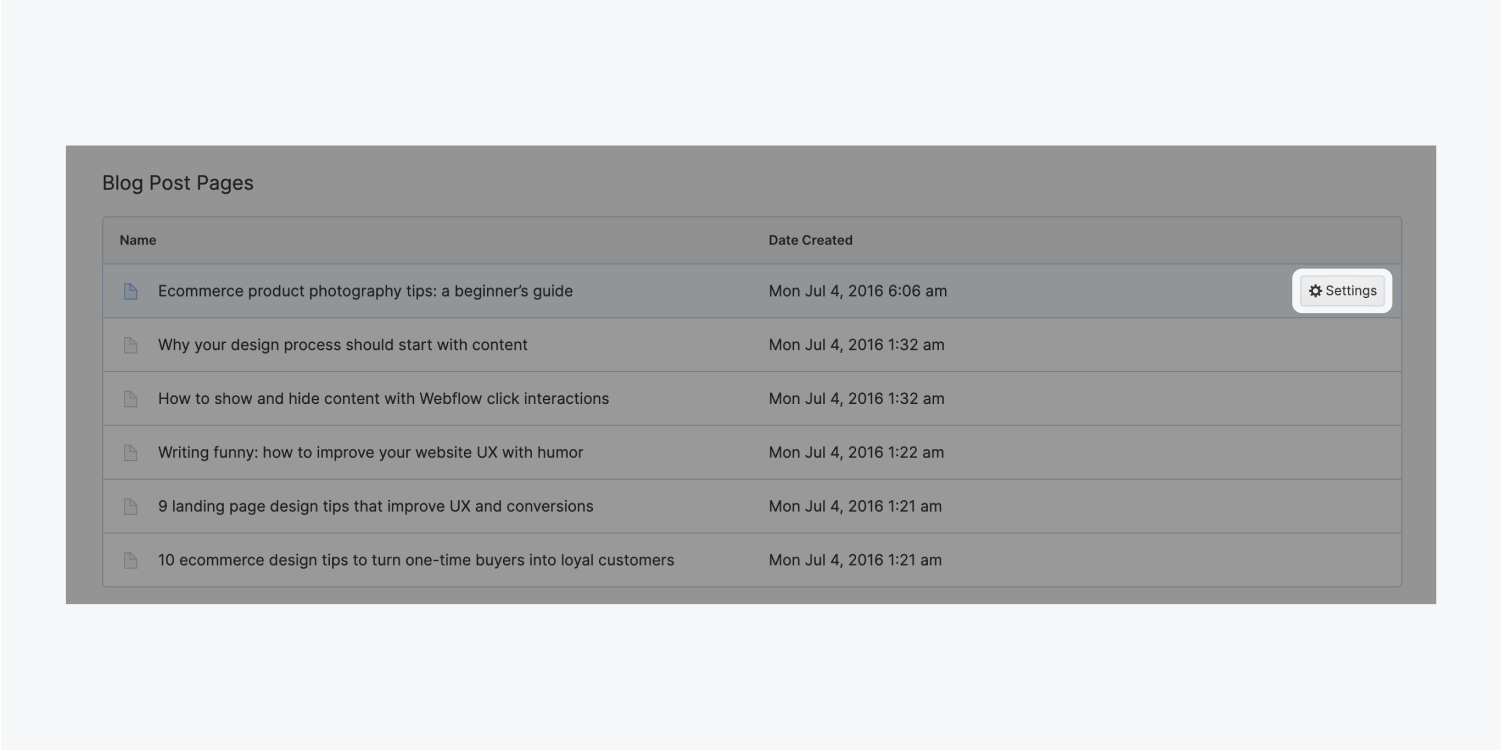
To access the settings of a page:
- Open the Pages tab in the Editor panel
- Hover your cursor over a page in the list
- Click on the Settings button that appears
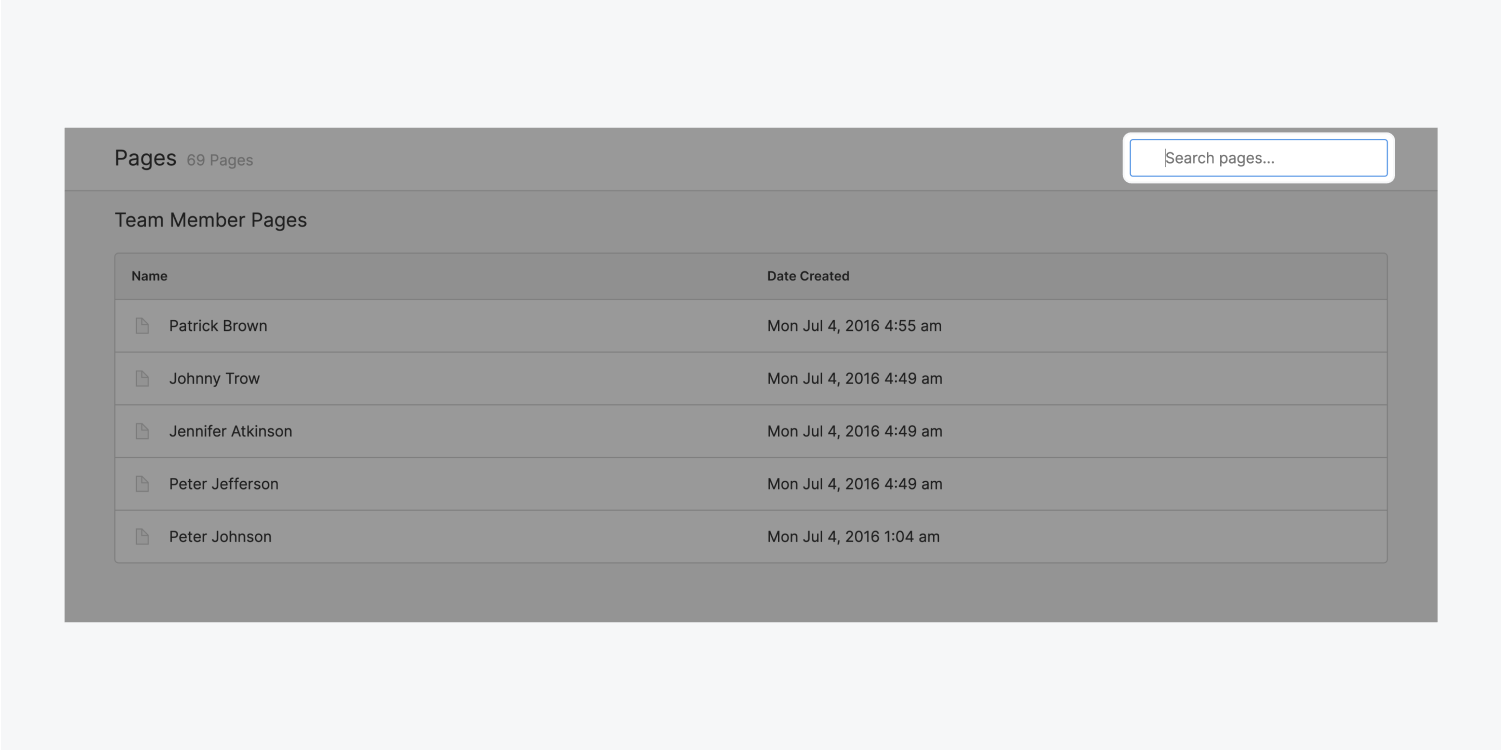
You can also search for pages by name using the search bar.
Clicking on the page, instead of the Settings button, will close the Pages panel and open the corresponding page.
Creating and managing dynamic content
If you have Collections in your project, you can access them in the Editor through the Collections tab. The Collections Panel lists all your collections. Clicking on a collection opens a new tab titled the name of the collection. This tab contains all Collection items within that Collection.
Creating and editing content
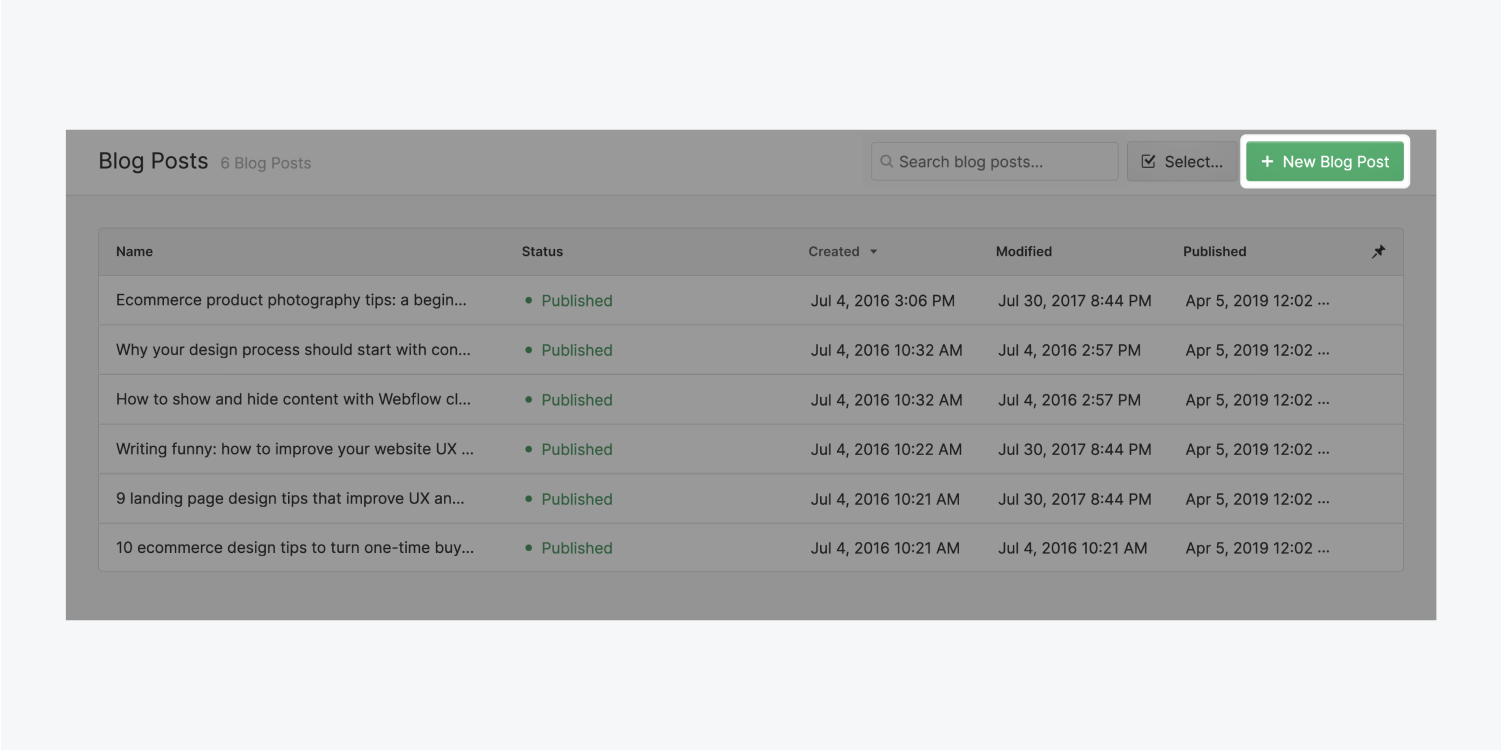
You can edit existing items by clicking on them or creating new items by clicking the + New button and filling out the item’s various fields.
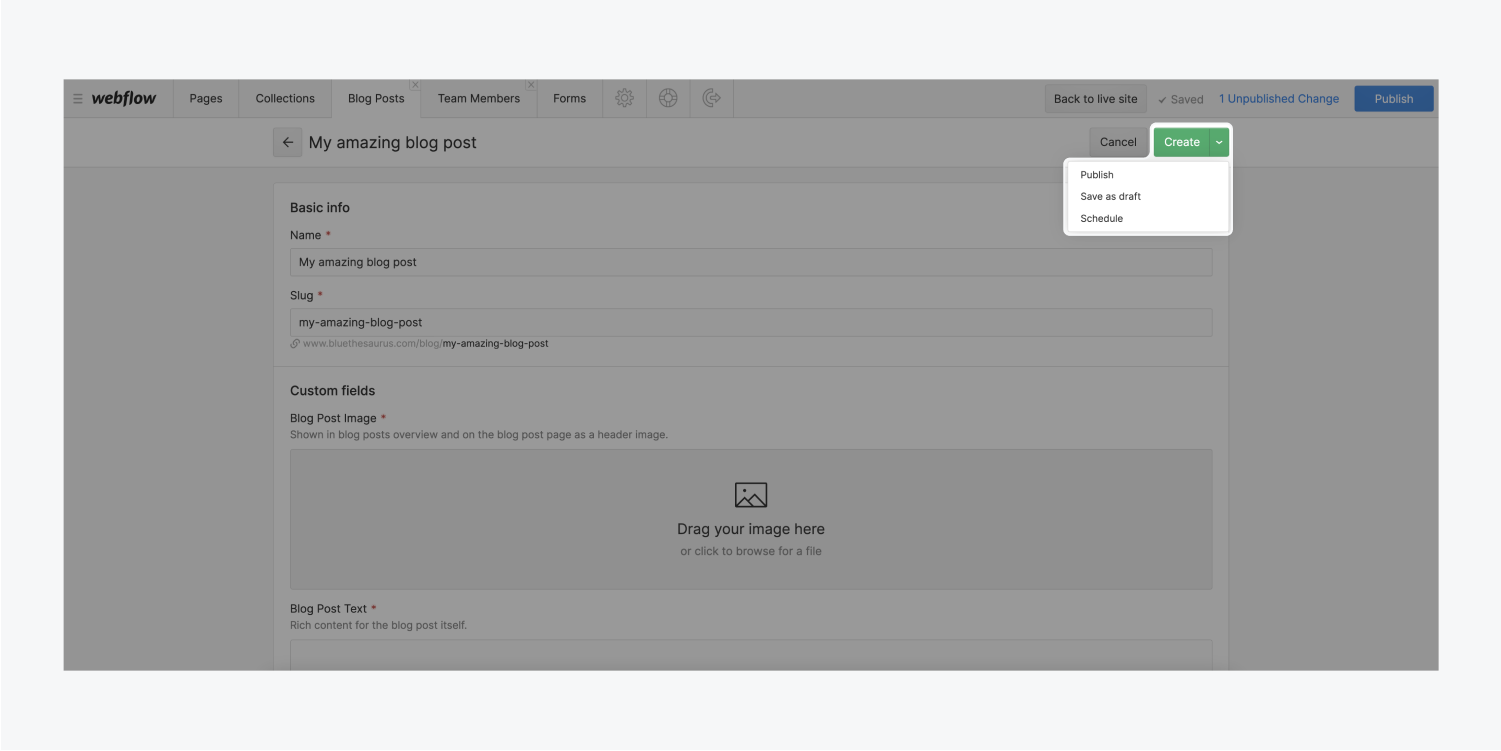
When you’re done entering content or updating fields, you can choose to:
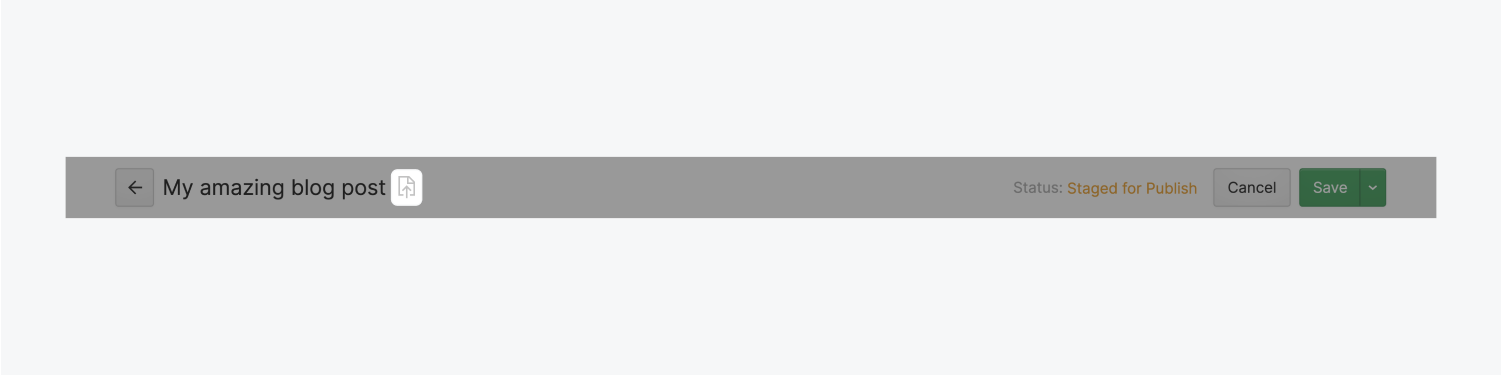
Create a new item or save an existing item. It will be staged to publish and go live on your site next time you publish it.
Publish your item right away (without waiting for the next site-wide publish to take place).
Save as Draft if you aren’t quite ready for the item to go on the live site.
Cancel to discard changes.
You can view the Collection page for that item by clicking the icon to the right of the item name. This collapses the panels to show you the page for the item you’re currently viewing right in the browser. If you’d like, you can edit it there, instead of in the panel.
To go back to the Collection item's list, click the Back (←) button.

Managing content
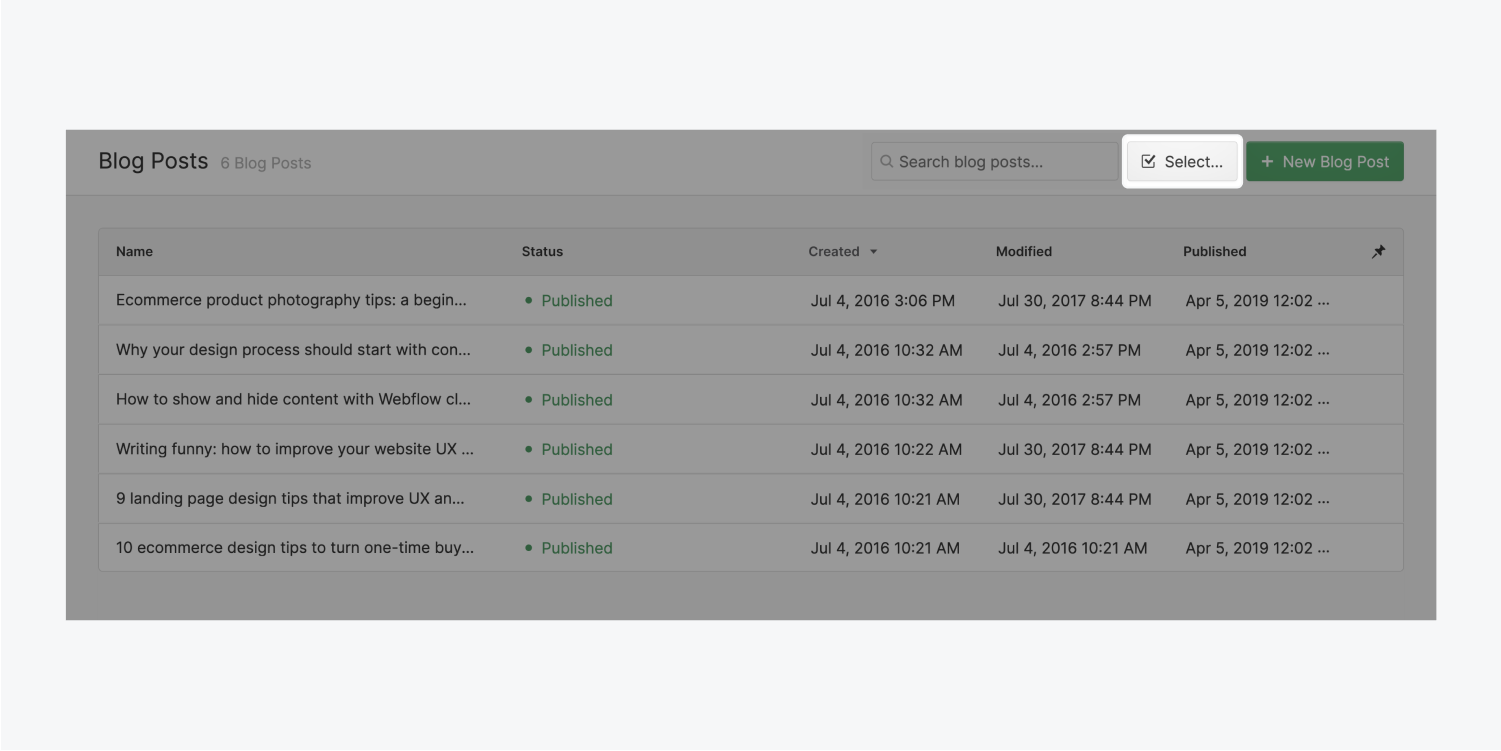
In the Collection Panel, you can see all your Collection items and their statuses. You can delete, archive, or change the status of several items all at the same time. To do that:
- Click the Select... button
- Select the items you want to manage
- Choose the action you want from the top toolbar
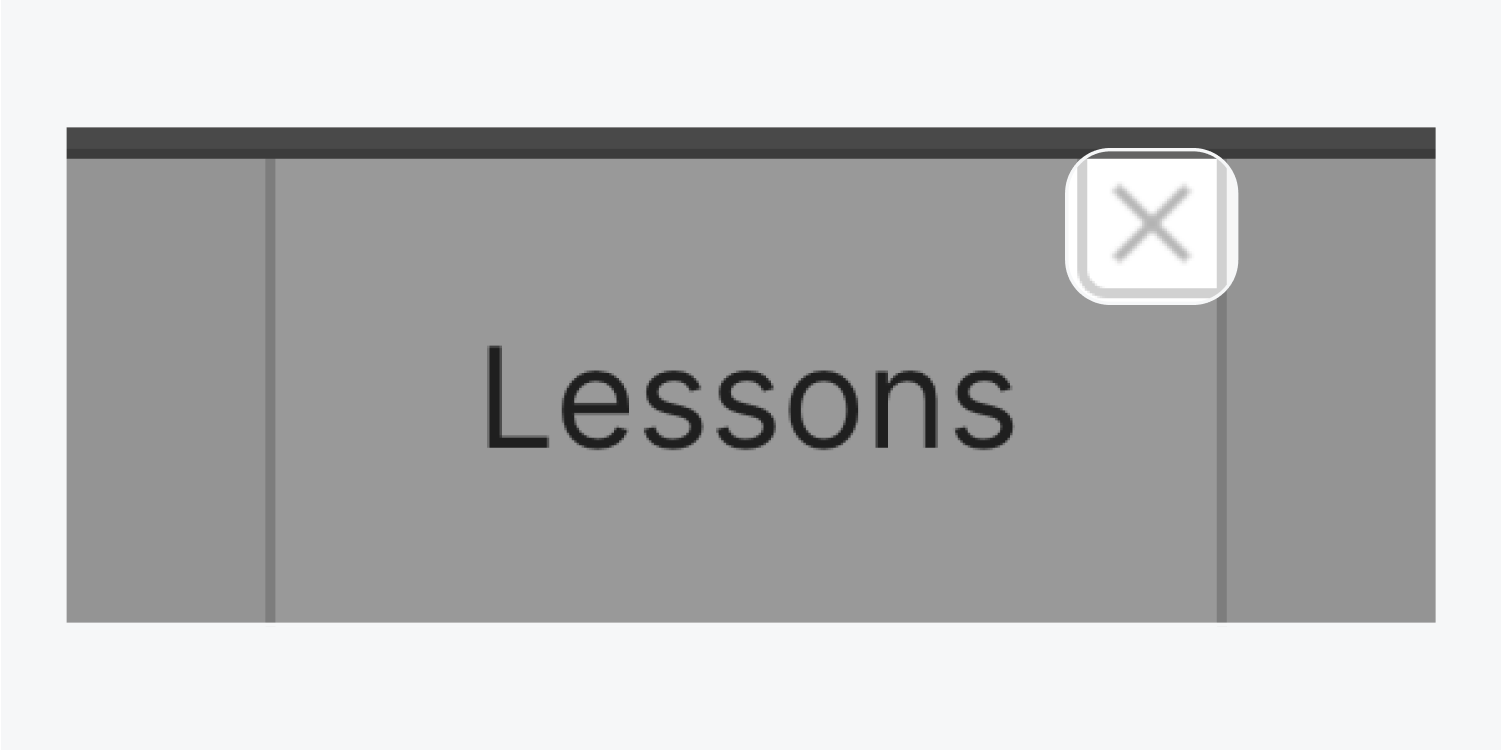
To close the Collection tab, click the close (x) button in the top right of the tab.
Viewing and publishing changes
After making all these changes, you will want to view them, make sure they're saved and ready to be published before clicking Publish.
Viewing changes on the live site
While working in the Editor, the Editor panel covers most of your website. To collapse the Editor panel and view your website, click the View Site button at the top.
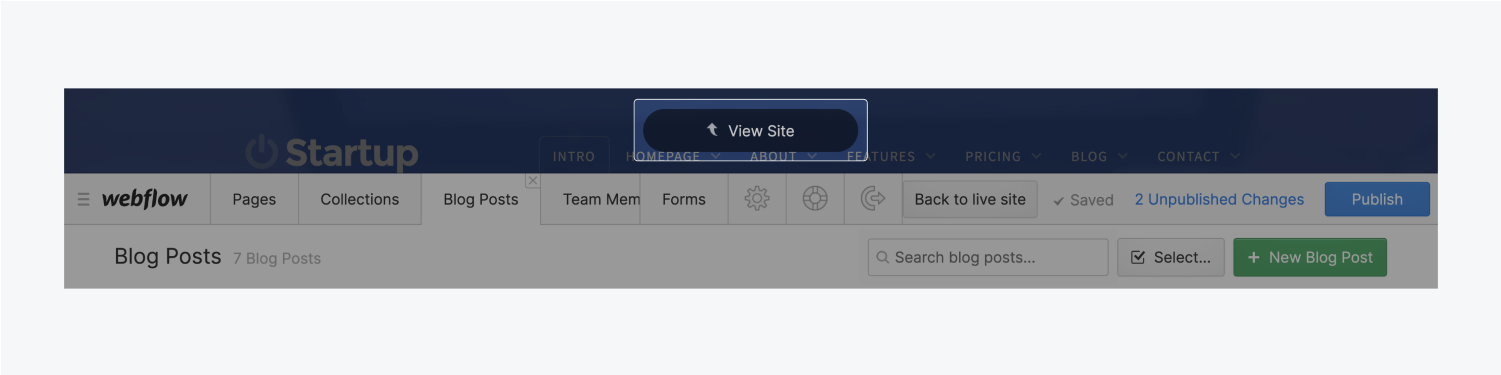
In this view, you can browse your website just like you usually would, and make or view changes to any page.
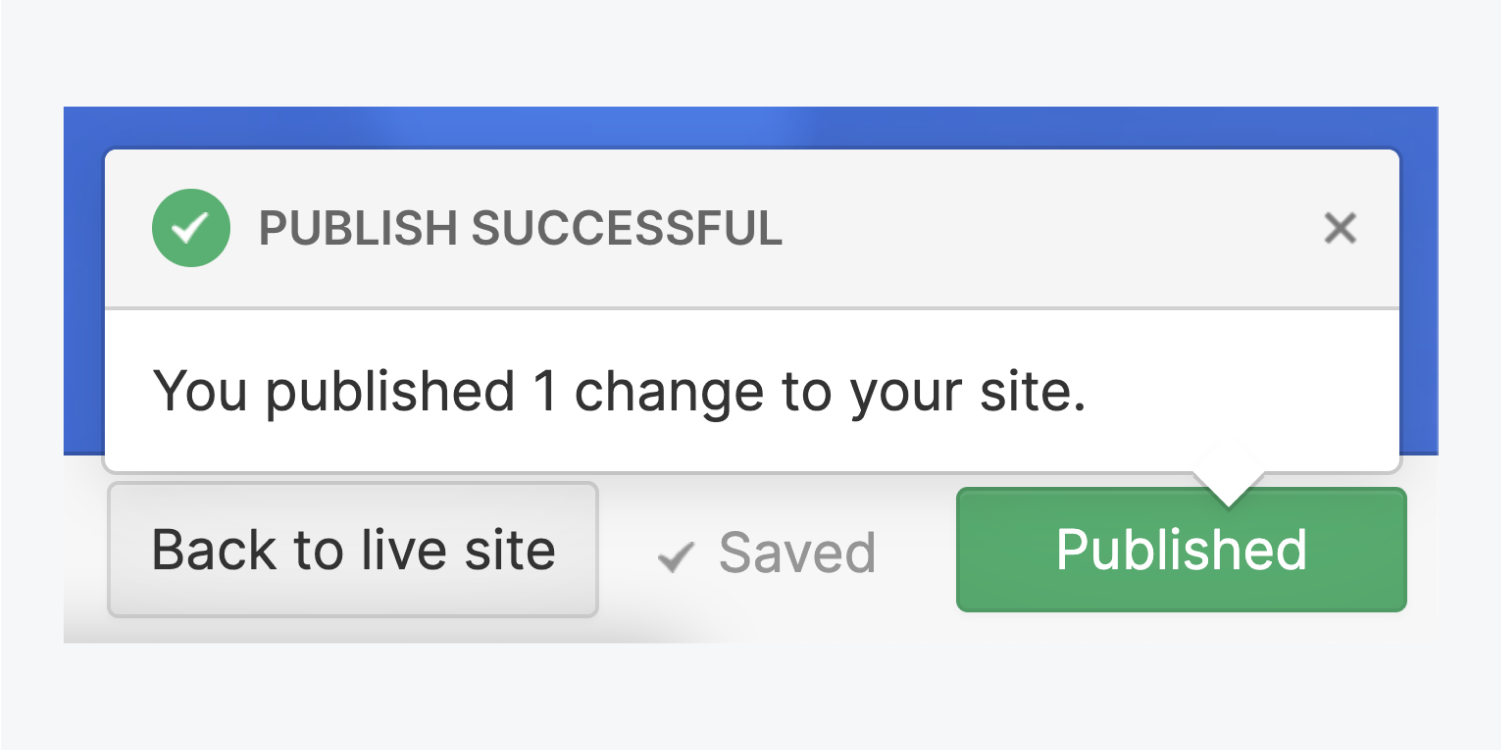
Publishing
The changes made in the Editor won’t be made on the live site until you either publish the edited item(s) individually or press the Publish button to publish all staged changes. You will need to confirm that you want to publish all changes before the site is actually published. The green Published button will confirm this.
Accessing form submissions
If you have any forms in your website, the Editor will include a Forms tab. Here, you’ll be able to view some basic information from forms people have submitted, but it’s most useful as a place for you to download the complete form data. In the downloaded CSV file (a format that works with all the major spreadsheet apps), you’ll be able to see all the submitted info.
Shortcut keys
You can also toggle Collaborators on a selected element using the shortcut keys:
- Mac: Command + Shift + L
- Windows: Control + Shift + L
Adapted from Webflow University
Recent insights
.png)

.webp)